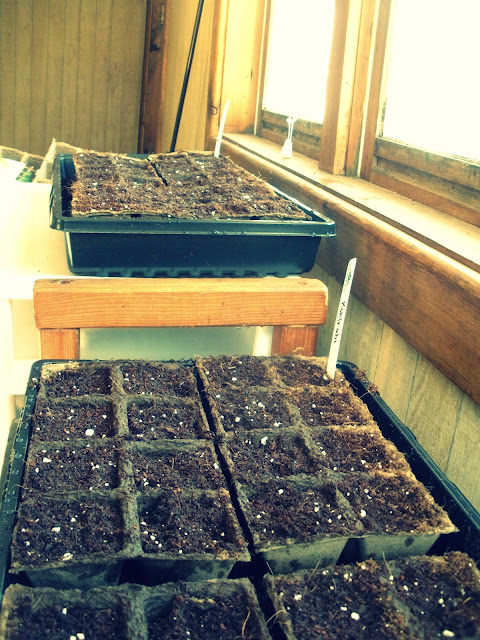
We'd ordered our seeds over a month ago and have spent the last month buying the necessary supplies. What are the necessary supplies? Oh, gosh. There's so few.
Seed-startin' soil
Flat Trays
Cell Trays or Biodegradable Cells (pictured below)
Gloves (you should wear gloves whenever working in soil. There's stuff in there that can get under your nails and cause infection. You'll notice my sister isn't wearing gloves. She's bad@ss like that.
A watering can (preferably one better than ours)
Identifying Tags
A Sharpie
The tips of your fingers or anything of equal value that can poke holes into dirt
Also, seeds. I'm planting:
Johnny's Selected Seeds (JSS): Hybrid Cabbage, Early Green, Gonzales F1
JSS: Hybrid Kohlrabi, White, Winner F1
JSS: Hybrid Tomato, Cherry Tall Vine, Sun Gold F1
JSS: Tomato, Heirloom Tall Vine, Moskvich
Now, necessary supplies gathered (don't forget those fingertips), go ahead and clear out a workspace for yourself. One you don't mind getting dirt all over. We chose a window seat; the planted flat trays will actually use this space later to sit in the sun and get their lives started.
Got your seed-startin' soil? Your seeds? How about a flat tray or cell tray? (Whichever is best for your particular seed; it should say on the back of the seed packet).
Let's get started! You should be as excited as I was. To put that into perspective, I dumped the pack of ID tags out on the floor and dropped my camera behind my bench. I want you so giddy about seed-planting that clumsy things happen.
We decided to plant tomatoes first. They like to start out in flat trays, so I poured soil into the tray (and, surprisingly, none outside of it). Follow the directions specified on your seed packet.
Our seed packet didn't specify how far down we should plant the seeds, so we just poked an "arbitrary" finger in there. Don't worry, we were polite about it.
Tomato seeds are so cute! (I can't help it. There's really no other way to explain them. "Small"? That's not good enough.)
We put one seed in each hole. Very, very delicately. At one point, I whispered to my sister: "We're so quiet. It's like something sacred is happening."
She spoke (softly) back to me (above a whisper), "I'm holding my breath."
We pushed the soil over the seeded holes and evened the surface.
Tomatoes done, we moved on to the kohlrabi and cabbage. They have very similar-looking seeds, which surprised me. Little purple(ish) seeds that were fatter than the tomato seeds.
My sister corralled the photogenic hand gene from the gene pool. (Yes, those types of shenanigans happen in gene pools.)
We planted the seeds in biodegradable cells. This will save a lot of time and mess during the transplanting process. You can just break off the cell and place it in new ground. We laid the cell blocks in a flat tray to make it easier to carry them and to catch any stray dirt (yeah, a lot of stray dirt happened this time around).
We followed the directions on our seed packets and poked holes (with our handy fingertips) about 1/4-1/2" deep into the soil.
As much as I felt like I was baking with some wonderful and dense chocolate flour, I knew better than to eat it.
Little tiny seeds going into holes! The kohlrabi and cabbage were planted three or four to a cell, so there's likely a lot of seed chatter going on beneath the dirt there.
We covered them up and labeled them. We wanted to plant the beet seeds into a barrel, but couldn't understand the sowing instructions. I'll clarify with Mr. UpCountry this evening about what the archaic jargon means (he's planted his own veggie garden before, but is letting me take the reins on this one).
Once he's let me in on the secret beet code, I'll be planting them into barrels (along with cucumbers).
All is said and done. We cleaned up our minimal mess and placed the trays in my sunny windows. I watered the plants with my new watering can (which turned out to be horrible and almost drowned the poor things).
Now the waiting begins... Anticipation could increase my giddiness, but I'm sick of cleaning up after myself, so I'm going to chill out and let nature takes it course.
I'll be covering their lives from here on out. For now, I'll let them sleep and dream about what life is like.


Hi Jenna- thanks for following me! I enjoyed your very detailed seed post- it's hard taking photos all the way through a dirty project like that :). I got my seeds going awhile ago and I think I did it too early- lots of things are overflowing their peat pots and it's still too cold to transplant. Oh well- I'm learning.
ReplyDeleteThis is a learning experience for me as well (as I'm sure you can tell, since I can't even decipher beet-planting directions), but I'm hoping that, by following my family and community's words of wisdom, they'll be ready to transplant as soon as the ground is ready to greet them!
DeleteMy father told me the best transplanting or direct planting time is the second week of June. We're in Zone 3, so it might be earlier than for you. If anything, my seedlings might have to drag out an extra week, but I'm hoping they can handle that. Good luck to you and your overflowing peat pots! :)
This comment has been removed by the author.
ReplyDeleteI like to water my seed starts from the bottom like a wick it works really well :) Good luck with your seeds!
ReplyDeleteI've heard of that before, and I'd love to give it a try, but my flat and cell trays don't have any drainage, so there's no way for water to get UP into them.
DeleteWe'll see how some serious TLC with a spray water bottle treats them! :)